What is the System Recordings Module used for?
The System Recordings Module is used to record messages that can then be played back to callers in other modules. It can also be used to make pre-installed Asterisk recordings available for use those modules.
For example, you might create a recording called "Main Menu" and then select that recording to be played in the IVR Module before a caller is asked to make a selection. Or you might record a recording called "Holiday Message" and then have that message selected in an Announcement. You would then route incoming calls to the Announcement or IVR using the Inbound Routes Module.
The System Recordings Module allows you to create a recording and name that recording so that it can be selected as the recording to be played in any module that supports the playing of recordings. Among others, the IVR Module, Announcements Module, Follow Me Module, Queues Module, and Ring Groups Module contain options to select a recording.
Overview
The System Recordings module allows for the management of built-in recordings and provides an easy to use interface for adding new recordings for IVRs, Announcements, Queues and so on.
Logging In
- If you have not already done so use log in to the PBX UI.
- On the top menu click Admin
- In the drop down click System Recordings

Adding a System Recording
There are two ways to add System Recordings.
From your phone
Simply enter your extension number and press Go.

When you press GO the message above will appear.
To save the recording
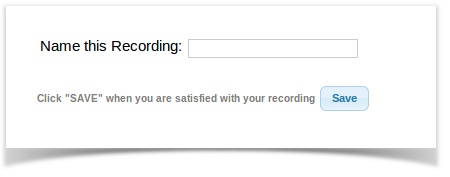
Enter a descriptive name and press Save
Upload a file
Upload a recording in any supported asterisk format. Note that if you're using .wav, (i.e. recorded with Microsoft Recorder) the file must be PCM encoded, 16 Bits, at 8000Hz.
Select a file that meets the above criteria

You need to wait until the page reloads (an indicator that the file has finished uploading) and at that time the Name this Recording field will be populated with the file name. You can change the name to something more appropriate if desired and press Save.

Editing a system recording
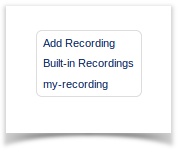
Choose your recording by clicking the name in the right side navigation
Once you click on the name you will get the edit page

Change Name
In this field, you may change the short name, which is visible on the right side of this module’s page.
Descriptive Name
This is displayed as a hint when selecting this recording in an IVR, Announcement, Queue, etc.
Link to Feature Code
Checking this box creates an optional feature code that can be used to re-record the System Recording.
Feature Code Password
Optional password to protect the feature code from unauthorized (or accidental) re-recording.
Files
In the files section you may string multiple files together, re-order them (by using the up/down arrow buttons), listen to them (by pressing the blue speaker button) and delete files (using the trash can button).
Re-recording an existing system recording
To revise the audio in an existing system recording, the easiest way is through a phone handset.
Re-record through a phone handset
Ensure that the system recording has the "Link to Feature Code" option enabled. Note the displayed feature code. It will be something like *292.
If the re-record password option has been enabled and a password set, note the password as well as you will need to enter the numeric password before you will be allowed the change the system recording.
Once these one-time steps have been performed, the recording can be re-recorded from any phone without further interaction with the administrative Web UI. Here is the procedure to re-record an existing system greeting using the defined feature code.
- Call the feature code from a phone handset (for example, dial *292)
- Follow the system prompts to re-record the system recording
- After confirming the new recording, just hang up.