User Control Panel (UCP) is a replacement for the aging ARI Module in FreePBX starting with FreePBX 12. It currently has the following modules/sections.
You create users and manage their permissions inside the User Management module in FreePBX, Admin Menu
The Call History section allows you to see all inbound and outbound calls for your user and listen to any call recordings that are associated with that call.
Conferences
This page can be used to view conference room status and to manage conference room settings for a given conference room. This is only available with a licensed copy of Conference Pro
Usage
Empty
When the conference room is empty you will see the page below

Users Present
When users are present you will see users and be able to perform various actions on those users
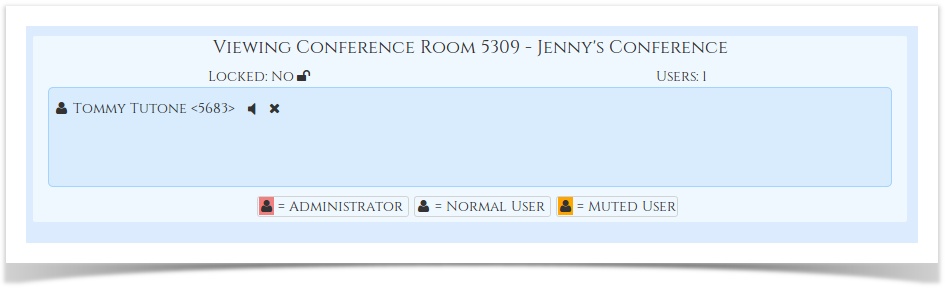
Mute User
To mute a user click the "speaker" icon next to their name.
Kick User
To remove a user from the conference click the "X" next to their name. The system will inform them they have been kicked then drop them.
Settings
On this tab you can change settings for the chosen conference room.
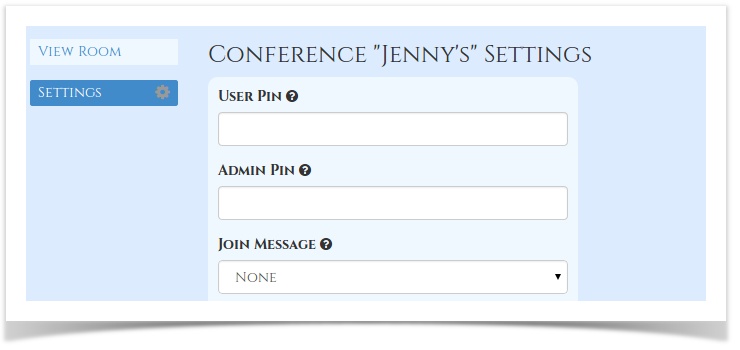
User Pin
You can require callers to enter a password before they can enter this conference. Leave this blank for none
Admin Pin
Enter a PIN number for the admin user.
Join Message
A message to be played to the caller before joining the conference.
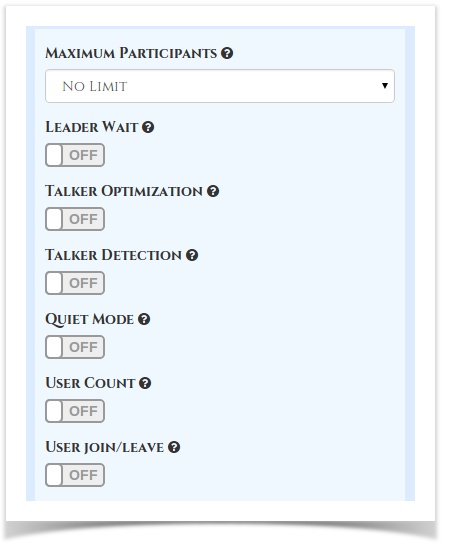
Leader Wait
Wait until the conference leader (admin user) arrives before starting the conference.
Talker Optimization
Turns on talker optimization. With talker optimization, Asterisk treats talkers who are not speaking as being muted, meaning that no encoding is done on transmission and that received audio that is not registered as talking is omitted, causing no buildup in background noise
Talker Detection
Sets talker detection. Asterisk will sends events on the Manager Interface identifying the channel that is talking. The talker will also be identified on the output of the meetme list CLI command.
Quiet Mode
Quiet mode (do not play enter/leave sounds)
User Count
Announce user(s) count on joining conference
User Join/Leave
Announce user join/leave
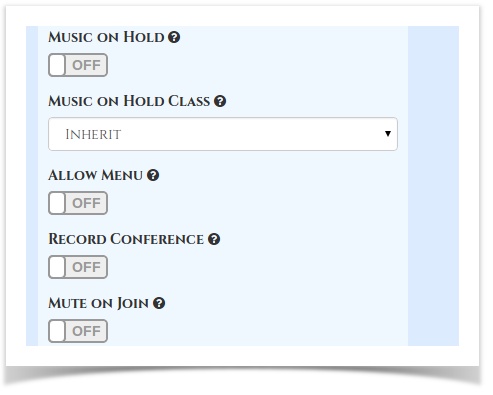
Music On Hold
Enable Music On Hold when the conference has a single caller
Music On Hold Class
Music (or Commercial) played to the caller while they wait in line for the conference to start. Choose "Inherit" if you want the MoH class to be what is currently selected, such as by the inbound route.
Present Menu (user or admin) when '*' is received ('send' to menu)
Record Conference
Record the conferences.
Mute on Join
Mute users when they enter the conference
Settings
On this page you can set user specific settings for users you have access to.
Usage
Find Me/Follow Me
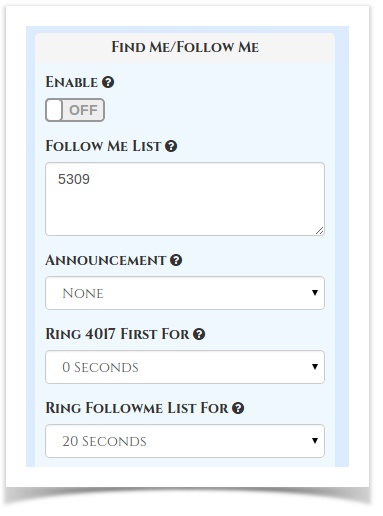
Enable
Should Find Me/Follow Me be enabled for this user
Follow Me List
List extensions to ring, one per line. You can include an extension on a remote system, or an external number by suffixing a number with a pound (#). ex: 2448089# would dial 2448089.
Announcement
Message to be played to the caller before dialing this group.
Ring <Exten> First For
This is the number of seconds to ring the primary extension prior to proceeding to the follow-me list. The extension can also be included in the follow-me list. A 0 setting will bypass this.
Ring Followme List For
Time in seconds that the phones on the follow me list will ring. The number of rings will depend on region. Example: If a phone rings for 1 second then waits 2, each ring is 3 seconds.
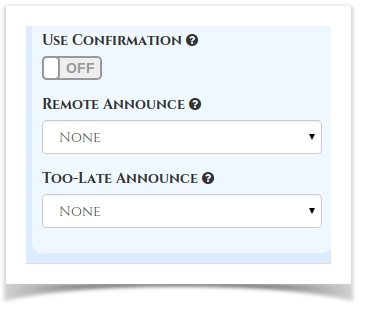
Use Confirmation
Enable this if you're calling external numbers that need confirmation - eg, a mobile phone may go to voicemail which will pick up the call. Enabling this requires the remote side push 1 on their phone before the call is put through. Example "Press 1 to accept.
Remote Announce
Message to be played to the person RECEIVING the call, if 'Confirm Calls' is enabled
Too-Late Announce
Message to be played to the person RECEIVING the call, if the call has already been accepted before they push 1.
Call Forwarding
Weather or not to forward calls in a given state. Check the box and enter the destination in the text field.
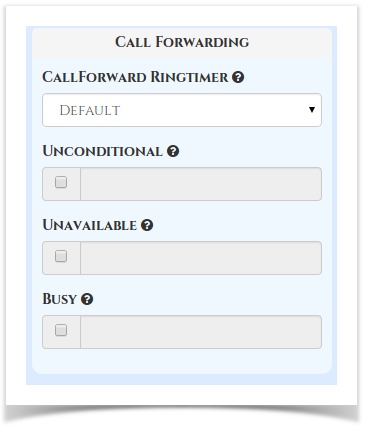
CallForward Ringtimer
Number of seconds to ring prior to going to voicemail or other fail over destinations that may be setup by an administrator on this account. The Always setting will ring the call forward destination until answered or the caller hangs up. The Default setting will use the value set in Ring Time. Your setting here will be forced to Always if there is no Voicemail or alternative fail over destination for a call to go to.
Unconditional
Forward calls immediately regardless of current state of line/PBX to the number entered.
Unavailable
Preconfigured number to which calls are forwarded if the customer endpoint becomes unresponsive due to an Internet outage or software/configuration failure of endpoint
Busy
Preconfigured number to which calls are forwarded if the customer endpoint is busy, usually due to being on an active call
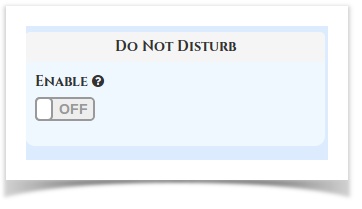
Do Not Disturb
Used to indicate that this user does not wish to be disturbed.
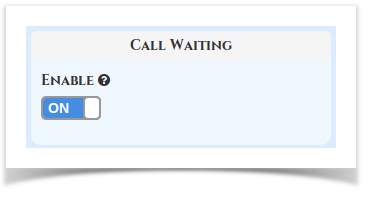
Call Waiting
A weather this user making a telephone call should be notified of an incoming call and is able to place the first call on hold while answering the second.
VoiceMail
In the voicemail section we can view, listen and manage our voicemail settings.
Managing Voicemail Messages
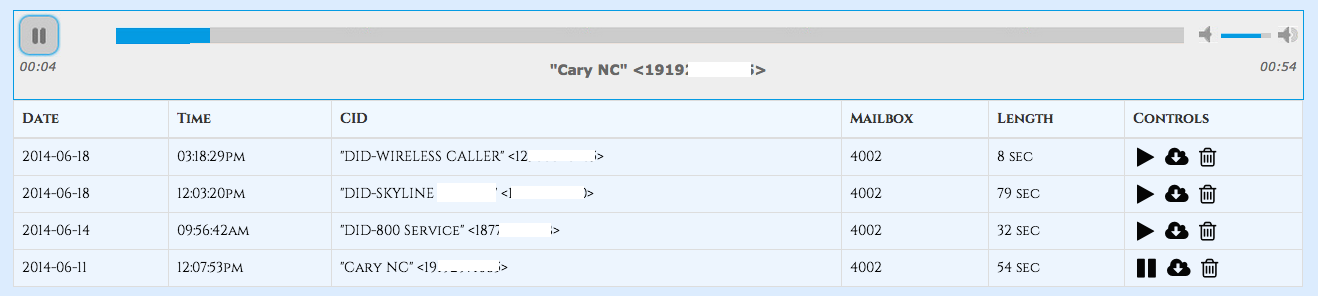
- For each extension we can see all our voicemails.

- For each voicemail we can see the following;
- Date- Date voicemail was left
- Time- Time voicemail was left
- CID- Caller ID of who left the voicemail if supplied
- Mailbox- Extension number where voicemail was left
- Length- Length in Mins and Seconds of the message
- Controls- For each message we can choose any of the following Controls
 |
Play the voicemail message in your browser |
 |
Download the voicemail message onto your computer |
 |
Delete the voicemail message from the system. |
- While playing a voicemail you can use normal player controls to pause, fast-forward and rewind the message inside your browser.
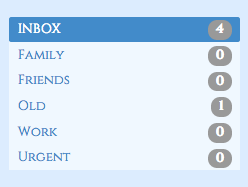
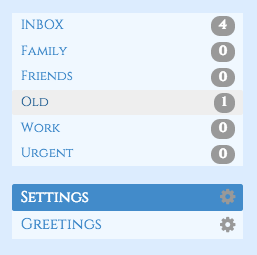
- On the left side are a list of folders that voicemails can be moved to. Clicking on any folder will bring up the voicemails inside that folder.
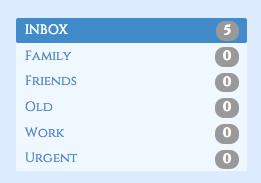
- At anytime you can drag a voicemail from any folder into any other folder and the message count next to each folder will auto update.
Managing Voicemail Settings.
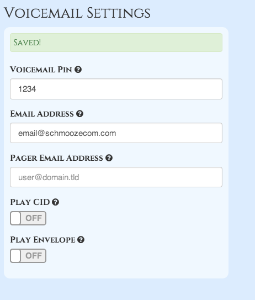
- On the left side of our voicemail section we have a option called Settings.
- Settings is where we can manage the following options for our voicemail box.
- Pin/Password- The password for our voicemail box.
- Email Address- Email address if defined where to send voicemails to.
- Play CID- Play the Caller ID of who left the voicemail anytime you listen to the voicemail
- Play Envelope- Play the date and time stamp of when the voicemail was left anytime you listen to the voicemail.
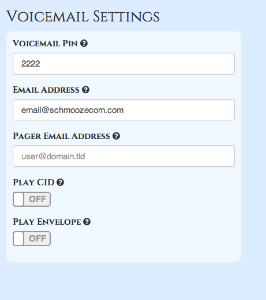
- Anytime you make a change there is no save button. All changes are instant and a greenbox will show up informing you your changes have been saved
Managing Voicemail Greetings.
- On the left side of our voicemail section we have a option called for Greetings
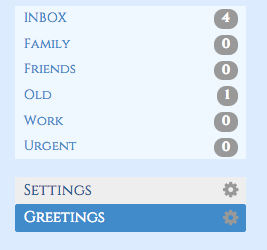
- Greetings are where we can control the announcement that is played to callers with our personal message. Your PBX has the following types of greetings.
- Unavailable- The greeting that is played to callers when you are not available to take their call and they go to your voicemail box.
- Busy- The greeting that is played to callers when you are not available to take their call and you are on another call already.
- Name- This is a recording of your name and used mainly for things like the Company Directory and other modules.
- Temp- A Temp greeting when recorded will be played instead of the Unavailable or Busy greeting. When you delete the greeting your other greetings will be played again.
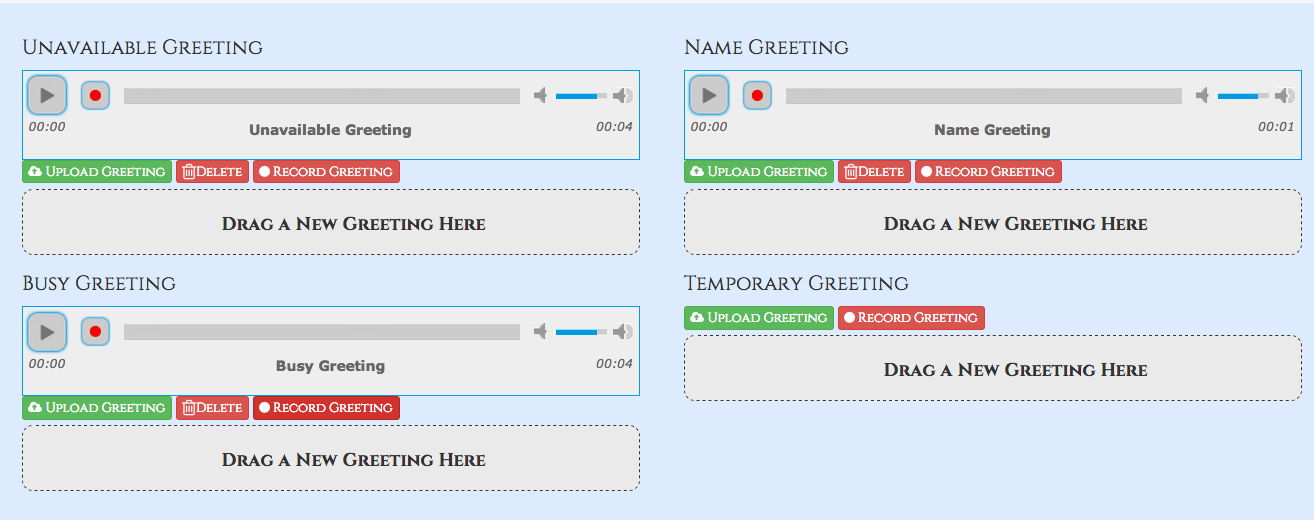
- For each greeting you can press the Play button to listen to the Greeting.
- You can press the Green "UPLOAD GREETING" button to upload a new audio file for your greeting or you can drag your audio file from your computer into the "Drag A NEW GREETING HERE" box to upload a new greeting.
- Pressing the red "DELTE" button will delete the voicemail greeting.
- Pressing the Red "RECORD GREETING" button will prompt you to enable your Mic on your compute and let you record your greeting.
Press Save once done recording and your new greeting will be saved.
- If you would like to copy your unavailable greeting to also be your busy greeting simply drag the Unavailable Greeting to the "Drag Box" of the Busy greeting as shown below.